Believe it or not, but we are already past the halfway point of this fall semester. Spring will be here before you know it, so there’s no time to hang around! Get a head start on the spring by creating your course sites now because Spring 2023 rosters are now in Sakai. With Fall Break around the corner, this coming week is a great time to get started on your spring courses.
Consider Canvas: Have you heard the news? The University is moving from Sakai to Canvas and instructors have already switched 23% of courses into the new system this fall semester. The final semester to teach in Sakai is Spring 2024 but you will want to consider moving sooner than later to take advantage of migrated Sakai content now in Canvas. There are several ways to get help with the transition. See more on Canvas for SP23!
Step 1: ConnectCarolina
To create your course sites in Sakai, you must be listed as one of the following for each of your course rosters in ConnectCarolina ![]() :
:
- Primary Instructor
- Secondary Instructor
- Proxy
- Dean’s Designate
Contact your departmental course scheduler to list you in ConnectCarolina with the appropriate instructor role. If you log in to ConnectCarolina and don’t see your courses listed for Spring 2023, your scheduler needs to make this change. Please note that it may take up to 24 hours to update in Sakai. Also note that Teaching Assistants in ConnectCarolina cannot create course sites in Sakai.
See more information on access:
Step 2: Create Spring 2023 Course Site
Once your departmental scheduler has listed you on your course rosters in ConnectCarolina and our Sakai data has refreshed (happens 3 times a day), here are the steps to follow on creating your course site.
Get started by clicking on the Sites waffle icon > Create New Site OR Home > Worksite Setup > New. Then follow these steps:
- Select course site
- Set Academic term to Spring 2023 and Continue
- Check course roster you want to create and Continue — Check *only 1 roster* if you want separate course sites
- Edit Home Description (or later) and Continue
- Check tools you want to use and Continue — can add/remove later
- Leave as Draft and Continue — remember to publish site when ready
- Create Site
Notes
- If you want to reuse any old course material, you may do so before continuing in Step #5 through the “Re-use Material from Other Sites You Own” option. You can also wait until after you have created your site and use the Import from Site feature. See details on duplicating course content.
- If you checked multiple rosters in Step #3 but actually wanted separate Sakai sites for each roster, you can remove the extra roster from the course site that was created through Site Info > Edit Class Rosters. Once removed from the existing site, the roster will become available for you to repeat this process and create a separate site.
- If you left off a roster, you can add the extra roster to your existing Sakai site.
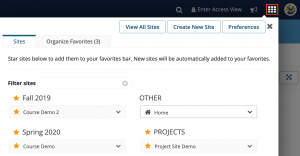
Step 3: Organize Favorite Sites
Your new sites will automatically appear in your top favorites bar. You may remove old Sakai sites from your favorites bar by clicking the Sites waffle icon and then the star next to each site you wish to remove (star will dim). You can also completely hide sites from your view through Preferences. The Organize Favorites tab allows you to reorder how your tabs are listed. Up to 15 sites can be displayed in your favorites bar.